How to Winterize a House
HOW TO WINTERIZE A HOUSE
Winterizing a house means preparing the inside and outside of your home for use in cold weather. As temperatures continue to drop and frost visits your home each morning, it’s time to start thinking about winterization.
There are multiple parts to winterizing a home. The goal is to keep your house warm, safe and maximize efficiency during the coldest time of the year. Winterization does take some time, so make sure to start before the first snowfall with these tips!
WEATHERPROOF WINDOWS
Weatherproofing windows is necessary to insulate windows for winter and trap in warmth. There are different ways you can weatherproof your windows. Window plastic for winter is a popular option. Adding a plastic film layer over windows helps to keep the heat in and the cold out. It’s also easy to stick on and take off when needed. Additionally, window draft stoppers are an easy purchase and act as a hassle-free insulator for your home. They are also good to reuse for several winters. If you're looking for more efficient and effective ways to weatherproof, then weatherstripping your windows or installing storm windows could be better options
INSTALL STORM WINDOWS
Storm windows are windows that are installed on the interior or exterior of a home's windows. You can either install these temporarily or permanently with materials varying from glass, rigid plastic, and flexible plastic. Storm windows offer more protection as opposed to single-pane windows and help with cost savings. Interior storm windows are easier for installation and can be ideal for apartments and two-story homes.
SEAL WINDOWS FOR WINTER
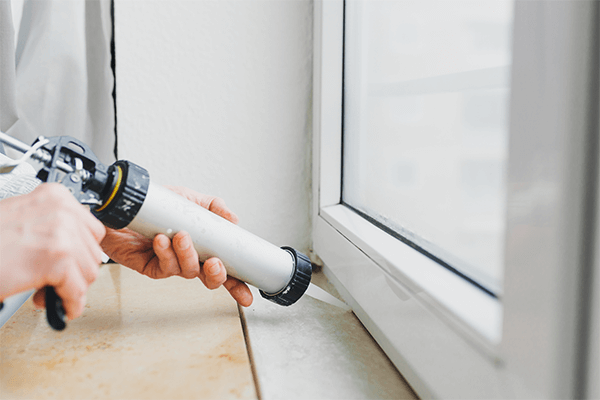
Sealing windows, or caulking, is another way to weatherproof your home. Start by checking for drafts around windows and doors. One way to check for air leaks is to seal your house by locking up all doors and windows. You should also close any dampers and vents. Next, open up exhaust fans that blow outside air. Using an incense stick, walk around your home to see where the smoke flickers near windows or doors. Wherever the smoke is blown into the house is where a draft is. Weatherstripping helps to cover these air leaks and ensure no cold air makes its way in.
Caulk around these window and door frame drafts on the inside and out to keep heat from escaping. In short, caulking usually requires these steps:
- Buy the right caulk - Latex and silicone are popular types of caulk that people use. Latex caulk is easy to apply and easy to remove. But this means it needs to be replaced more often. Silicone caulk is flexible so it expands and contracts with your home during temperature changes. It’s long-lasting, but can be a little difficult to install upfront.
- Caulk during ideal weather - Weather plays an important role in applying caulk. Choose a dry day that has temperatures between 40-80 degrees Fahrenheit. Also, make sure the upcoming forecast is dry so the caulking has ample time to dry as well.
- Prepare your window - For best practice, make sure your window is prepared to be caulked. This involves removing old caulk and cleaning your window to remove dirt and grime.
- Apply the caulk - When caulking, point the nozzle at a 45-degree angle. It’s also recommended to start caulking in an inconspicuous spot so if you happen to mess up, it’s not visible. As you work your way around,
you’ll be more comfortable with the visible areas. Be sure to only caulk 2 to 3 feet at a time so you can smooth before caulking starts to dry. Lastly, smooth down the bead and clean up mistakes as you go. Then, let it dry!
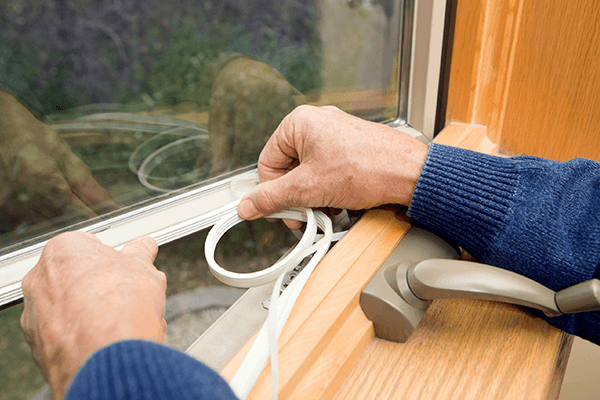
WEATHERSTRIP WINDOWS
Weatherstripping also helps to cover air leaks and insulate your home. This helps trap heat inside and reduce drafts from sneaking into your home. Similar to caulking, weatherstripping starts with checking all your windows for leaks to find where cold air sneaks in.
Common weatherstrips for windows include:
- Tension Seal
- Felt
- Reinforced Foam
- Self-stick
- Rolled Vinyl
- Tubular rubber or vinyl
Choosing the right weatherstripping depends on the condition of your windows, the types of windows, where it's being installed, if you want low-maintenance installation, and how much you’re looking to spend. If you already have weatherstripped
frames, you should still check for drafts and replace weatherstripping if necessary.
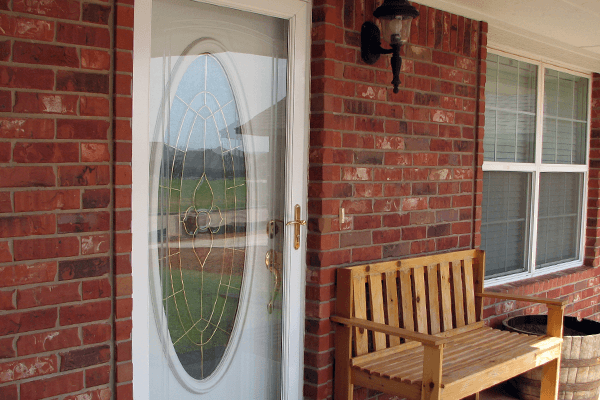
WEATHERPROOF DOORS
Weatherproofing doors involves sealing doors and changing screens to storm doors. A storm door is a type of door that is installed in front of your home's exterior doors to protect it against poor weather conditions. Storm doors do a much better job of keeping the warm air in, plus they stop harsh winds and cold air from getting into your home. As a bonus, they also can enhance curb appeal to your home and act as an extra barrier against home intruders as well. The three basic types of storm doors include full-view storm doors, mid-view storm doors, and high-view storm doors.
To further weatherproof, winter door seals are a great option for stopping cold wind from getting into the
bottom of the door. They’re relatively inexpensive and low maintenance to use. Similar to windows, you can also weatherstrip and caulk around exterior doors to ward off the cold.
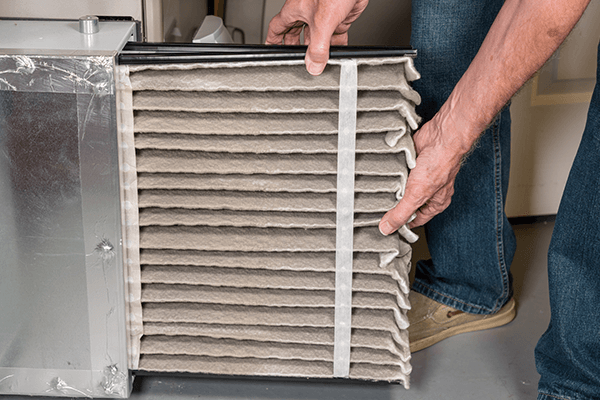
REPLACE YOUR AIR FILTER
Clean or replace the air filter in your furnace for maximum fuel efficiency of your HVAC system during the colder months. This also helps to reduce energy bills and extend the life of your furnace to reduce operating costs in the long-term. You can
also clean off your air vent grates. Read more here on how often you should replace your air filter based
on your household size.
GET YOUR AIR DUCTS CLEANED
Furnace cleaning is invaluable to the way your home breathes and performs. NADCA recommends you should clean your air ducts every 3-5 years. Depending on the situation of your home, that number can change. With up to 40 lbs of dust and dirt accumulating in your vents every year, duct cleaning helps to reduce allergens and improve indoor air quality. Learn more here on why air duct cleaning is so important and how it can help purify your home.
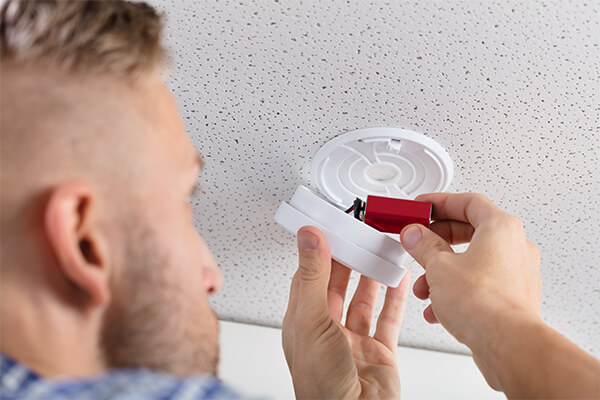
CHECK SMOKE DETECTORS
Check that your smoke alarms and carbon monoxide detectors are in working order, if not, replace batteries. According to the U.S. Fire Administration, cooking is the leading cause of winter house fires so
it’s important to make sure your smoke detectors are working properly. Smoke detectors typically last anywhere between 8-10 years, but you should replace batteries once or twice a year. It’s recommended to install smoke detectors in every bedroom, outside all sleeping areas, and on every level of your home. You should also install detectors in the living room as well as at the bottom
ceiling that leads up to any stairways.
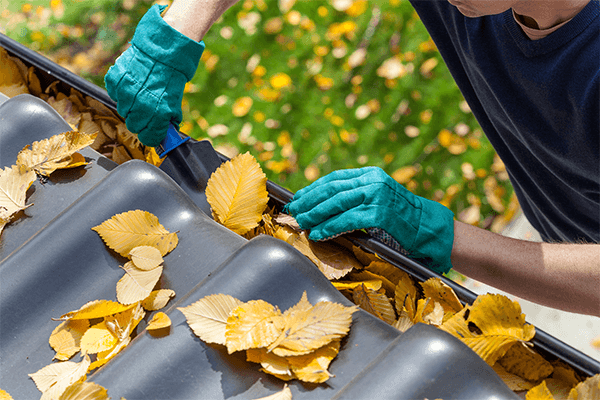
CLEAN GUTTERS
Cleaning your gutters of leaves and debris will allow water to run through to your troughs evenly. If your gutters are full, snow and ice melt can overflow, creating icicles and weighing your gutters down. If you have extra weight in your gutters there’s a possibility they could detach and need reinstallation.
For best practice when it comes to cleaning gutters:
- Wear a long sleeve shirt and rubber gloves
- Be sure your ladder is stable and secure
- Use a plastic scooper to remove leaf debris
- Have a plastic tarp to throw the gunk onto instead of your lawn
- Flush gutters with a garden hose after clearing out all rubbish and dirt
TRIM THE TREES
Trimming the trees for the winter is an important precaution to take for you and your home’s safety. During harsh weather, snow and ice can weigh down weakened branches and cause them to break off. Depending on where these branches are, this
could result in damage to your home or car. Be proactive and have dead branches or limbs removed.
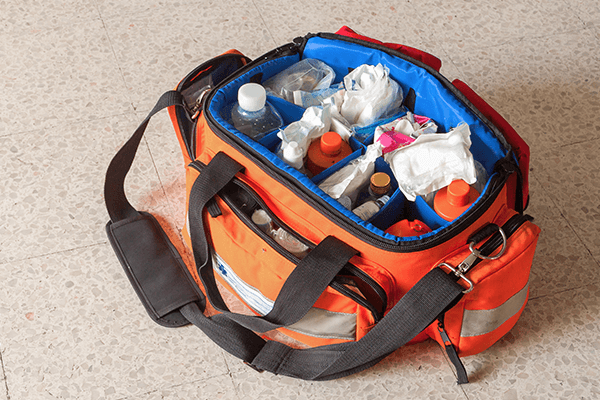
CREATE WINTER SURVIVAL KIT
Creating a winter survival kit is a smart safety measure to take for your home and car. Emergencies happen when you least suspect so being prepared will help alleviate potential stress.
Items to include in a winter survival kit for your house or car include:
- LED flashlight with working batteries
- Portable phone car charger
- Candles and lighters (for in the home)
- Basic tool kit with items like a screwdriver, wrench, hammer, and duct tape
- Blankets, scarves, gloves, and hats
- Bottled water
- First-aid kit with items like band-aids, compression tape, gauze, antibiotic cream, and medical wrap
- Collapsible snow shovel
- Fire extinguisher
- Hand and feet warmers
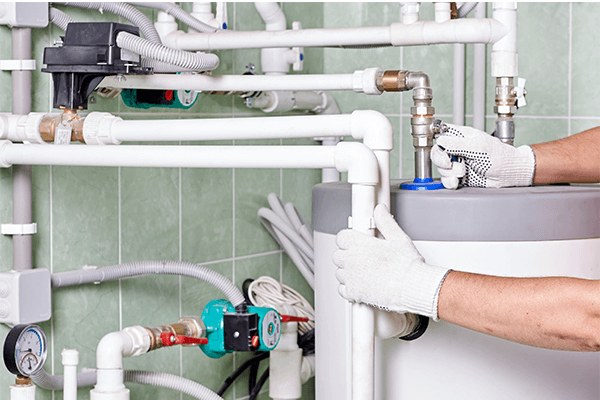
WINTERIZE PIPES
Finally, winterizing your pipes protects them against the cold and helps stop them from bursting during below-freezing temperatures. To efficiently winterize the piping in your home, tightly insulate with foam. This is especially important to do where pipes are exposed to cold air like underneath your sink or near exterior walls. During frigid weather, remember to open cabinets to expose
pipes to your home’s heat and to have water slightly running to prevent bursting pipes.
Looking to survive the upcoming winter? Call us 24/7 at 1-800-STEEMER to schedule services like air duct cleaning or for our water damage restoration if an emergency strikes.